How
to Make Your Own Fabric Flower Tutorial
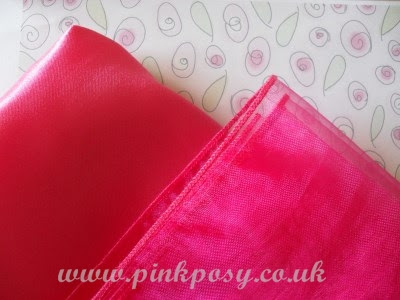
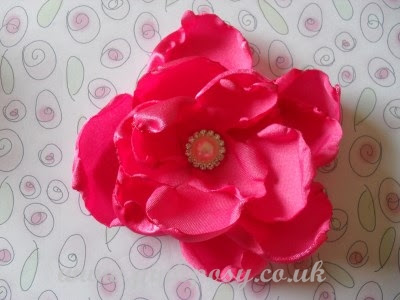
(Fabric flower- Made with Polyester Satin & Organza Fabric with a Pink Posy Clear diamante gem cluster embellishment*)
Ever wanted to know how to make fabric flowers? Want to add something pretty and
glamorous to your hair, dress, bag or gift? Here is an
easy-to-follow tutorial on how to make your own!
What
You Will Need:
- Fabric-
Polyester Satin
- Organza
Fabric (optional Extra)
- Small
Piece of felt for the back of the flower
- Piece
of A4 Card
- Ruler
- Pencil
- Textile
Scissors
- Glue
gun and Glue Stick
- Candles
& Matches (or a lighter)
- Hair
Clip or a brooch pin
- Embellishment
to finish
(Why not choose a rhinestone embellishment from Pink Posy's wide selection!)
- Measure
and Cut Out Template Squares
On
your piece of card, measure out 4 squares (these will become
progressively smaller.
1
x Large Square at 10.5cm x 10.5cm
1
x Medium Square at 9cm x 9cm
1x
Second Smallest Square at 8cm x 8cm
1x
Smallest Square at 6.5cm x 6.5cm.
(All
measurements are rough- You can play around with different sizes to
see what you prefer)
On
each square, draw lines through the middle to find the central point. Measure approximately 15mm from the centre point on each line and
draw a line through it (as shown in the photograph).
Cut
all templates out and cut along the dotted lines up to your
15mm
markers to produce a slit on each side of the square.
2. Choose
your fabric.
(Polyester Satin)
(Polyester Satin Matched with Similiar Colour Organza Fabric)
Choose
your preferred fabric colour. You can make your flower with all
Polyester Satin or you could add more layers to your flower using
additional organza material. If you wish to use the organza material
as well, use your templates with the organza to cut out another 4
matching sized squares to your polyester satin.
3. Draw
Around Your Templates
and cut out the Fabric Squares.
Draw
around your Templates onto the Non-shiny side of the material and cut
out the corresponding squares. Not forgetting to cut the slits on
each side of your squares.
You should have 4 Squares of descending sizes.
4. Curl
the edges of your Squares to Make Petals Using the Heat from above
the flame of your candle or Lighter.
***Please
be very careful when doing this next part.***
Ensure you
test out a piece of spare fabric so that you can get used to the
effects of the heat on your fabric and how quickly the edges melt.
Have the shiny side of the fabric on the outside (closest to flame).
Do not put your fabric in the flame- this will burn it, holding your
fabric a little distance over the flame will be enough to melt and
curl the edges of your fabric. Testing will allow you to see how
quickly the edges begin to shrivel and melt, holding over the heat
too long may cause the material to shrivel too much, burn or develop
holes so practice first with your spare piece of fabric! Also ensure
there are no drafts near to where you are working.
Once
you feel more confident with curling the edges, now start with your
square pieces of fabric, curling the edges on each.
(If
you are using the organza fabric as well, just note that this melts a
lot quicker than the polyester-satin!)
How your square petals will look once the edges have been 'curled'
5)
Glue gun the middle of each curled square and glue these with the largest layer at
the bottom up to the smallest layer on the top, then embellish with a diamante gem.
(If you are
using Polyester Satin alone, this is roughly how your fabric flower
will look- made up with 4 layers. If you would like to add more bulk and glamour to your
flower follow the additional steps before gluing your fabric pieces
together).
6. Layering
with Polyester Satin and Organza.

So
you should have four curled pieces of polyester satin and 4 curled
pieces of organza material. Layer fabric- largest piece of polyester
satin, then largest piece of organza, then medium sized polyester
satin, then medium sized piece of organza etc...
Use a little bit of hot glue on the central point of your squares to glue the layers together.
Largest Satin Polyester Layer at the bottom then largest organza layer.
Until all layers are glued together, alternating the fabric.
Your Pre-embellished flower should look something like this.
7. Cut
out a small piece of felt for the back of your flower and hot glue
onto the back of your flower.
8. Attaching a hair clip or brooch to your flower.
Once
the felt is secure, glue gun a hairclip on with a smaller piece of
felt to secure it in place. Alternatively you can glue on/ stitch on a brooch
pin back.
9. Embellishing
your Flower- the finishing touch
Now,
for the finishing touch! Embellish your flower with a diamante gem, just add a
spot of hot glue to the back of your diamante embellishment and press to the
middle of your flower to secure. (Pink Posy's Clear Diamante Gem Cluster has been used on this flower)
Enjoy
your New Beautiful Handmade Flower!!
Fabric
Flower Inspiration...
A
stunning Accessory for your hair! Customise your flower to match your
outfit!!
Wear
as a brooch/ corsage on a dress, bag or belt to add additional
glamour.
(Ivory Pearl diamante gem cluster from Pink Posy features on all 3 of the 'Fabric Flower Inspiration' photographs).
*Please Note All rhinestone diamante embellishments pictured in this Step-by-Step Guide can be purchased directly from our site along with many many more beautiful items at: www.pinkposy.co.uk
Diamante embellishments that we currently Stock:
Ivory Pearl, Clear, Light Pink, Purple, Light Blue & Royal Blue Gem Clusters and Small Snowflake rhinestone embellishments.
Coming Soon:
Grey Pearl, Aqua Blue, Lavender and Smokey Blue Gem Clusters Coming Soon to www.pinkposy.co.uk!
If you would like more information about our products please visit our website or email us on sales@pinkposy.co.uk.